Silvertone 1457 tune-up
[FR : Quelques tuyaux pour bricoler votre Silvertone… à vos risques et périls !]
I love my Sears Silvertone 1457 guitar. Cheaply built almost 60 years ago, and apparently stored in a damp closet for a while, it deserved a little “tune-up”. Here is what I did. (Note: I have no training in guitar repair. I will take no responsibility for the content of this article or its consequences. Proceed at your own risk!)
I drilled a new hole and moved the strap button to a better position so the strap doesn’t fall off all the time. (Click on photos to enlarge them.)
I removed the strings, the knobs, and then the pickguard (careful, it’s fragile and the electronics are attached), and cleaned the electronic components with a cleaning spray. I cleaned the crud off the pickguard and knobs.
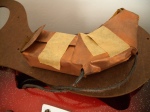
I used very fine (400) emery cloth, lightly moving along the fret (not up and down) to clean the crud off. I masked the rosewood with masking tape when sanding each fret to avoid damaging it. I then cleaned the neck and fretboard with a guitar-cleaning product.
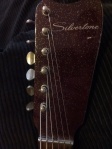
The tuning pegs did not turn smoothly. I removed the tuning pegs (a couple of screws and they come out neatly) and cleaned them, and then applied lithium grease to all friction points: on the gears and on the plates.
The original rosewood bridge saddle was badly worn, with repercussions on the guitar’s sound. I found an original new-old-stock saddle on the Internet. There are also modern replacement saddles available. Another approach would have been to replace the bridge with a metal adjustable one.
I wanted to lower the action (height of strings above the neck) but the top end of the bridge is held up by 2 wood screws that could not go any deeper in the body. Tightening them further would have made them pierce the body and stick out the back. The bottom end of the bridge is also held by a wood screw and in order to keep the strings tight against the saddle, this one must go in further as well. So, I used a metal saw to remove a few millimeters from each screw, allowing their heads to go lower. (This could have also been accomplished with a bench grinder or perhaps by changing to shorter screws.) I put a washer under the bottom screw to raise the bridge slightly, making more space for the balls on the ends of the strings to catch under the bridge, so they don’t slip out.
Having replaced the saddle and lowered the bridge, it’s time to set the intonation. Here’s how I do it; I don’t claim it’s correct.
- Tighten the screw on the back of the saddle so you can still move it a little bit. Position the saddle in a reasonable place and mount the bridge.
- Put on low E string. Stretch it. Tune it. Now fret at the octave position and adjust the left side of the saddle to tune to E.
- Put on high E string. Stretch it. Tune it. Now fret at the octave position and adjust the right side of the saddle to tune to E.
- Tune low E string, verify intonation of both strings and correct if necessary.
- Put on B string. Stretch it. Tune it. Now fret at the octave position and adjust the right side of the saddle to tune to B.
- There are now enough strings to hold the saddle in place, it should not move easily any more.
- Tune all three strings, verify intonation of all three strings and correct if necessary.
- Put on, one by one, A, G, D, and tune all strings each time.
- Verify intonation.
You can now set the height of the pickups using the screws on the back of the guitar. I put them close to the strings for more volume, but not too close or else they will buzz.
I have heard that it’s good to put some graphite on the slots in the nut when changing strings to help the strings slide, especially since the beautiful angular arrangement of the strings puts a lot of lateral stress on the string as it passes through the nut.
Also, I have a theory that the low E string should be wound around the tuning peg in the opposite direction, to reduce the angle and make it look better. If you try it, you will see that it’s logical. Yes, this means you turn it the opposite way to tune it.
A couple of years later, I became friends with a guitar maker and asked him what he could do to improve the Silvertone.

First, he made two cutouts in the bridge saddle so that it follows the intonation better.

Then, he fabricated a nut out of bone to replace the very worn aluminum one.
Finally, he did a proper setup.
The guitar looks and plays much better now. Good luck with your own Silvertone/Danelectro.
Filed under: music, text in English, top tips/vie pratique | 7 Comments
Tags: guitar repair, Sears Silvertone


Great post! I’m having tuning and intonation problems on my vintage Silvertone 1457 and 1452. I’m thinking of changing the tuners to Kluson tuners… Will they fit without having to drill new holes? Or maybe I should try and clean up the skate key tuners.
Thanks!
Cheers ! No idea for the Klusons but why not try cleaning and greasing the existing ones first to see if you are satisfied ?
Where did u get the replacement saddle for your 1457?
I just went on Ebay, searched for “danelectro saddle” there was a guy with new old stock.
What a nice job…Great project.
I am an owner also and love Silvertone Amps and guitars. I just created a forum to discuss all Silvertone issues at
http://silvertone.prophpbb.com/
An idea for that radio amp the silvertone comes with,people update thau electric cord with a 3 prong ground chord,dont die playing that guitar!
It’s true that you can get shocked ! My experience is that if you get a shock, you can turn the (2-prong) plug around the other way and it will stop shocking !